
Uploading and organizing videos
This guide explains how to upload videos to Pixop Studio, resume interrupted uploads, and keep your projects organized.
Before uploading
Billing must be set up for your team before you can upload videos.
For direct Pixop billing, this means adding a valid payment method to your team.
For AWS Marketplace billing, this means linking an active AWS Marketplace subscription to your Pixop team.
See Billing overview for more information.
Upload a video
From the Pixop Studio dashboard, you can either:
- click to choose a video file from your computer
- drag and drop a video into Pixop Studio
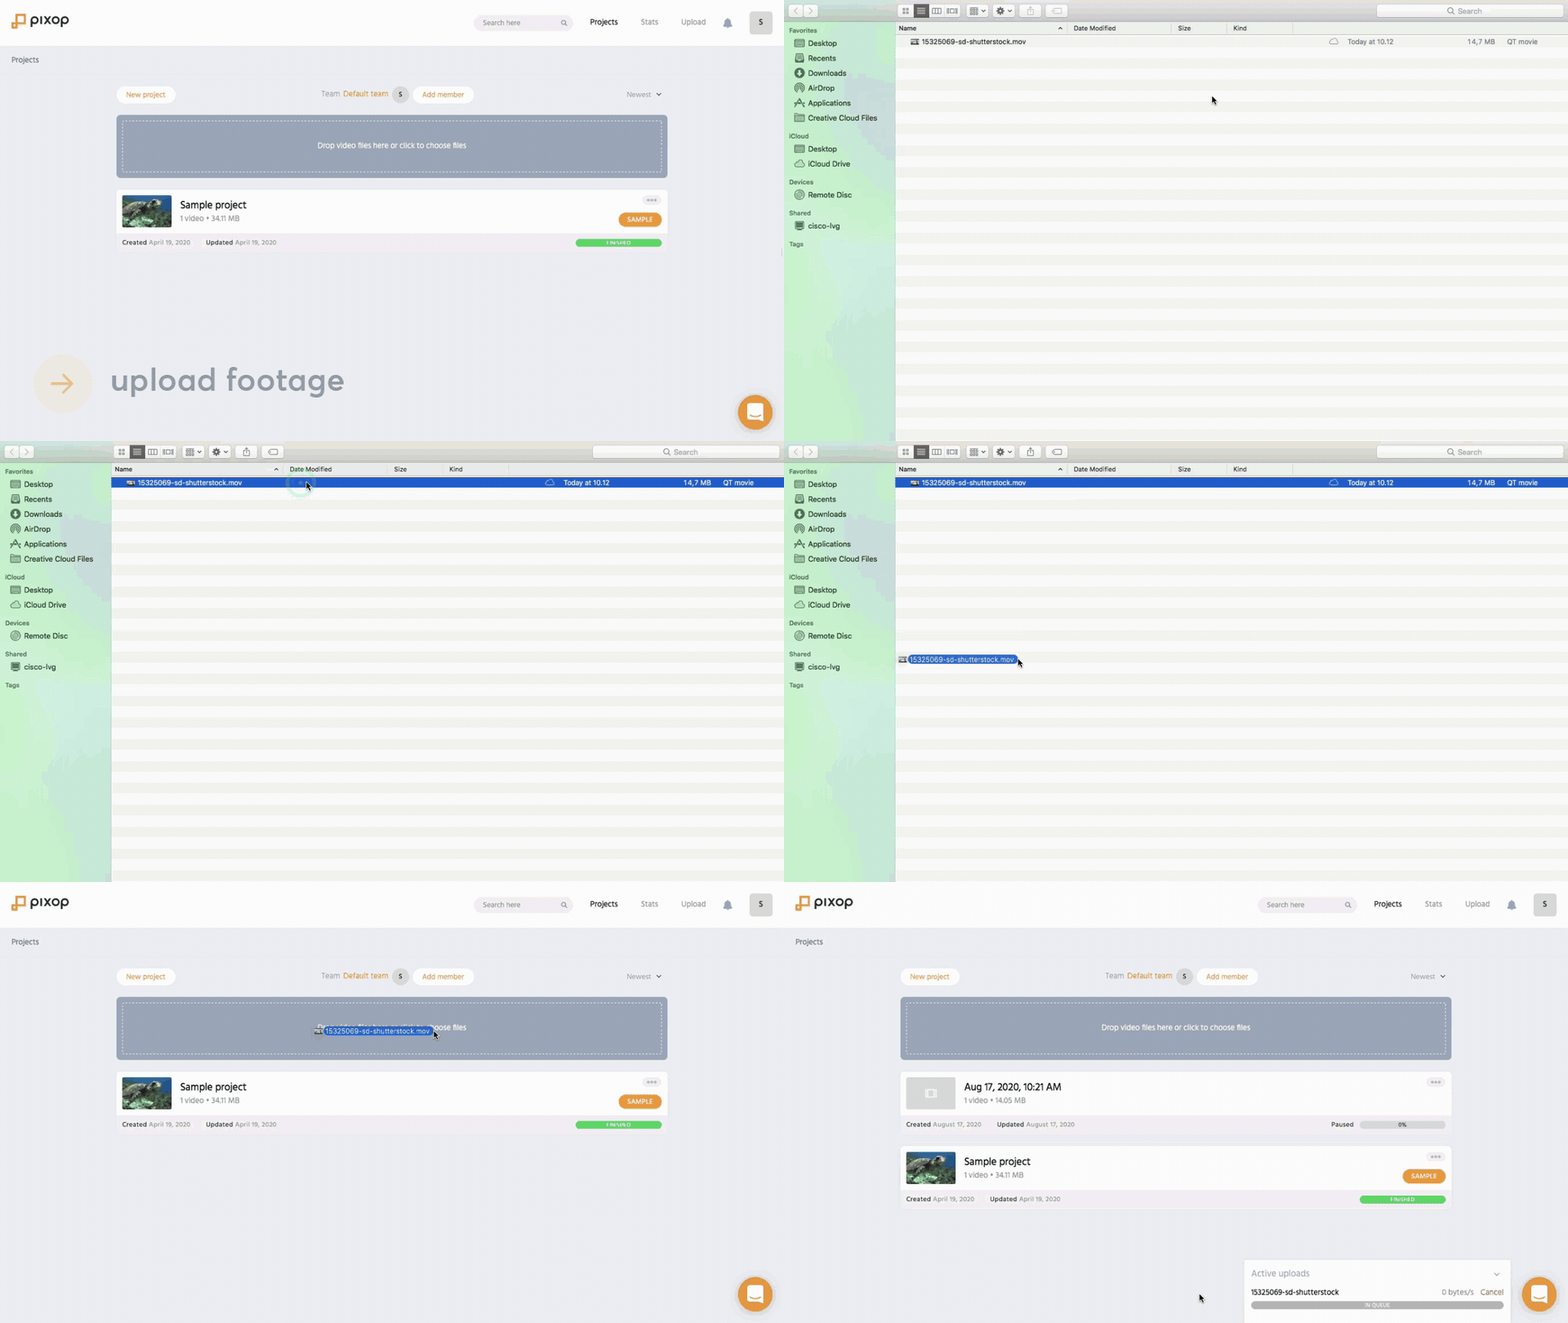
Pixop begins uploading and ingesting the video so it can be inspected and processed.
By default, Pixop also creates a 10-second clip from the uploaded video for testing filters and processing settings.
Automatic clip creation can be disabled in your Pixop Studio settings.
See Video quality, clips, and testing for more information about using clips.
Resume an interrupted upload
If you close Pixop Studio or otherwise interrupt an upload, you can resume it later instead of starting again from the beginning.
Click Resume upload and choose the same source file again.
Pixop resumes the existing upload from where it stopped.
Name your project
When a video is uploaded, Pixop creates a project for it and gives the project a default name based on the upload date and time.
You can rename the project to make it easier to identify later.
Click the project name, enter the new name, and confirm the change.
Using descriptive project names can make it easier to find and manage your videos as the number of projects in your team grows.
After uploading
Once the video has finished ingesting, you can review its technical information and quality analysis before deciding how to process it.
See Video quality, clips, and testing for the next step.
Need help?
If you have questions or run into problems, contact [email protected].
Updated 3 days ago